Pages

Showing posts with label Red. Show all posts

Sunday, 10 August 2014

It's Time to Lipsynch....For....Your..............LIFE!

I am, of course, quoting the Queen of the Glamazons, Ru Paul for the title of this post. As I intimated in my last, I have been watching and obsessing with the fabulous Drag Race over which she presides.

As you may have noted, there has been an absence of crafting going on around here. I've been drawing and doing small household projects but I've largely left my craft room untouched. There is a reason and it's something I've talked about on here before. The ebb and flow around creativity. And I've been in the Ebb mode recently. I'm okay about that. There comes a point when it's good for me to take a break and go look for inspiration instead. And strangely enough, this time around, I've found it in Ru Paul.

But before I go on, here's a teaser...


Now when I find a source I love, I really go full out and dig deep into it. I've been reading Ru's books, including his autobiography. I've been listening to his fortnightly podcasts, "What's The Tee". I've been watching his shows. And I've been learning a heck of a lot about creativity, authenticity and determination.


The TV show is a competition starting with 14 drag queens who are whittled down episode by episode until three remain. There is a grande finale show and from the top three, a winner is crowned Drag Superstar.

Now bear with me, there's a reason I'm going into this. You see, to the mainstream, this is what drag looks like...


Roxxy Andrews from Season 5.

These are the Pageant Queens.

But in Season 4, right from start, I was bewitched by Sharon Needles (Geddit?), whose look was more like this...


And she was forever having to defend her unique aesthetic. Then, in Season 5, I routed for Jinkx Monsoon....


She was another who had an original look, creating characters of a vintage era and was given a difficult time because of her oeuvre.

SPOILER ALERT: Guess what....

They both won in their respective seasons.

The outsider, in a community of outsiders, walked away with the title and crown. They stayed true to themselves against some harsh bullying from the Pageant queens. They had their own style and authenticity and kept at it when the competing queens were constantly putting them down.

Are you beginning to see why I instantly loved them both and cried buckets when the underdog won? Add to that, the story of Ru Paul's life and all the other queens, winners or not and I've been swept away in the tide of resilience, irreverence and creativity.

Now everyone has their own different preferred places to go seek some inspiration. The courage and convictions of drag superstars has been mine this summer.

Okay you've got this far...shall I post a card to show that the ebb is giving way to flow?

Okay...


It's my cliched homage to the world of drag


Now with that out of my system, it's time to grab my supplies and start crafting again


Wednesday, 9 July 2014

Love You Card

I'm back with another card. Told you the muse was upon me. I'm not even supposed to be making cards at the moment. I have another project or two I should be finishing off first. Oh well, I go where the muse takes me.


It's mainly a die job. I used Lil Inkers stitched rectangles to cut out the multi colour cards. I stuck these down onto a scrap of card and ran the whole thing through a large square Lil Inker's die. I backed onto black card which was run through the largest stitched square die and backed the whole lot onto red cardstock using foam mount. I stamped the sentiment and backed onto more black card which I die cut using Spellbinders scalloped square.

Now if this doesn't brighten up someone's shelf and add a touch of fabulousness, I don't know what will!

Saturday, 28 June 2014

Quick & Colourful plus a Little Adventure

Just a quick post today - no bells and whistles, showing a card I made whilst the web was down temporarily this morning (something to do with BT Broadband)


I sponged two colours of Distress Ink onto watercolour paper, Picked Raspberry (which I always read as Pickled Raspberry) and Salty Ocean. I used a stitched Lil Inkers Die to cut it out. I then used another die to cut out the sentiment in yellow card. I backed it all onto a glittery green base and stuck the whole lot onto red card.

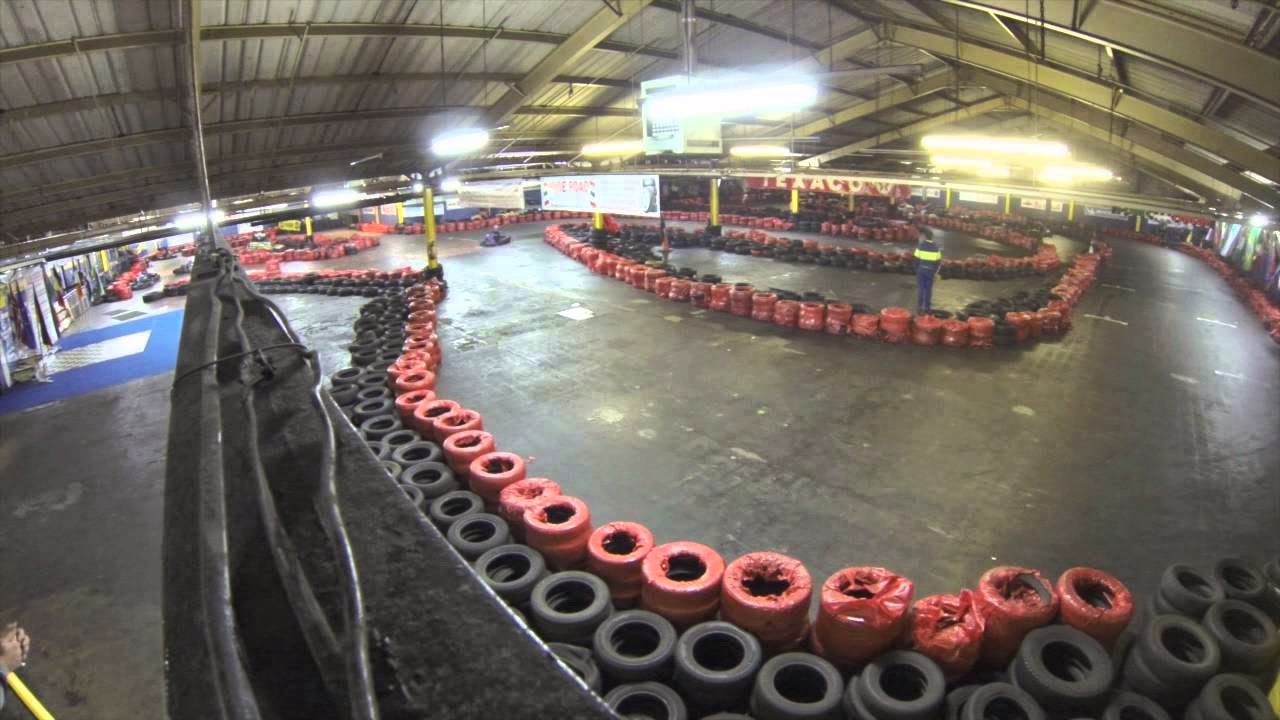
Oh, I almost forgot. Though I'm not posting about it as regularly, I'm still incorporating Adventure into my life and yesterday I attended something for the first time which Nick had arranged. It's an adventure I would never dream of doing - Go Karting! At an indoor centre in Manchester called Karting 2000.


(Not a photo we took. It's from their website)

Up front I'll say I'm happy to have tried it once but it really, REALLY wasn't my thing. Nick had a great time, which makes me more than happy enough to have attended. But I am not the most ambitious person when it comes to speed. I even have little old ladies overtake me on the motorway.

For 15-20 minutes, I stayed in the left hand side, pootling along at the slowest speed possible, cringing whenever I hit a tight bend. Everyone else happily squealed their tyres, threw themselves round the course and overtook me, many, many times. Oh and the noise! Those karts don't half make a racket. I was relieved when the chequered flag was waved to indicate the end. I am so glad there weren't any photos taken of me in shabby overalls, complete with a hair net and racing helmet, gagging on the taste of petrol that seemed to be permanently in my mouth.

If I hadn't come across exactly as a petrol-head to Nick before, then I think it sunk in afterwards. Boxing, I can do. Boys' toys, I don't. My normally pristine palms, had blisters. I was in danger of developing callouses!!! I couldn't wait to go home, run a bath, add lots of smelly salts and wash any evidence away that I had been near oil and grease.

Today, inking up a card in bright colours, I feel more at home.


Sunday, 25 May 2014

Colour Q #242

Hello Sweet Friends

I'm sat here tidying up my digital files on the computer listening to the rather marvellous music of Sohn. It's taking me back to my more youthful days. He's a musician  signed to the 4AD record label, who used to have my favourite artists on their books, the most well known being Cocteau Twins. So I'm drifting away here on a sea of experimental sounds.

Anyway, that aside, I actually pulled some of my paper stash out and made a card. It's for the Colour Q challenge. I haven't joined in with them for a while but when I saw what was lined up - I immediately wanted to see what I could do with these happy hues


I think this is fast becoming one of my favourite palettes. The combo is fabulous. Not sure I gave it full justice but this is what I came up with


And yes your eyes aren't deceiving you, I've used a glittery card too. I'm not sure without looking back through the whole of my blog but I think it's the first time I've ever made a project with glittery card.

Now you may find it goes a bit quiet on my blog throughout June. I'm going to be busy carrying out a few upcoming work projects with deadlines and for a few days, I'll be travelling as well. I'll not have time to make anything to share on here. But rest assured, all is fine. I'm dabbling in digital scrapbooking and making project life style pages as a creative outlet as this is easier to pick up and drop in short bursts. Hopefully, when I return to blogging, I'll have a few to share.


Thursday, 8 May 2014

Colour Q Challenge

Hello There Sweet Friends

I haven't joined in a creative challenge for some time now. I'm happy just making stuff as and when the urge arises these days. However, I was tempted to have a go at this week's Colour Q challenge.


And here's the card I came up with


I used the same flower die, the Memory Box Whimsy Circle, which I used in my previous post except this time, I filled in all the spaces. It meant cutting into three different colours of card and selecting the pieces from each to create a whole flower as above. So I have extras left over to use another day. The addition of a button not only finishes the design off, but adds the pink colour from the scheme.


Friday, 25 April 2014

Happy Birthday Rosette Card

Hello my sweet lovelies

Another card to round the week off. I was inspired by this idea I found on Pinterest which used Washi Tape with a rosette embellishment.


I used Tim Holtz Rosette die and blue card to cut the concertina strip. I added the black washi tape and then glue the rosette together before attaching a decorative brad to the centre.

I die cut a scalloped circle from further blue card and mounted onto the red card with foam mounts. I die cut the banner and stamped the sentiment before again using foam mounts to attach.


Wednesday, 16 April 2014

Thinking of You in Pink

Hello my dahlings

Thought I'd have a play with my Washi Tapes this time around. I sit staring at them on my shelf on a daily basis and as deliciously designed as they are, I never rip into them. So I thought I'd change that.


And it couldn't be any easier. I just cut down some white card and wrapped a few strips of the tape around it. I didn't cover the whole card as you can see, however the white seemed too stark and i wanted more colour. I trimmed a piece of fuchsia card and stuck this on instead.

I stamped the sentiment (in black - I know - not ready to loosen the chain on that one yet) onto pink card and die cut it. I mounted it onto the fuchsia card and trimmed by hand, to create a border. I tried the design against the black background and it felt like it needed another pop of colour. The hint of orange as a matting layer just gave it that extra oomph I was looking for.

Let's hope that I am tempted to use my Washi Tape again, before it gathers dust on my shelf as I really love the effect it gives.

Monday, 14 April 2014

Red and Black Again (but I did add other colours this time)

Hello my dear reader

I went ahead and made another card using red as my again. And as I mentioned a couple of posts back, I thought I'd try and do something other than pair it with my usual black.


I dug out some white cardstock instead and stamped a zigzag design using a rainbow of brightly coloured inks. Okay I used black to stamp and heat emboss the sentiment but I don't know about you but I can't seem to get away from black sentiments. I try other colours but they just don't work as well for me. I'm stuck in my ways for now.

Just to leave my black and red comfort zone was enough of a challenge lol.


Friday, 11 April 2014

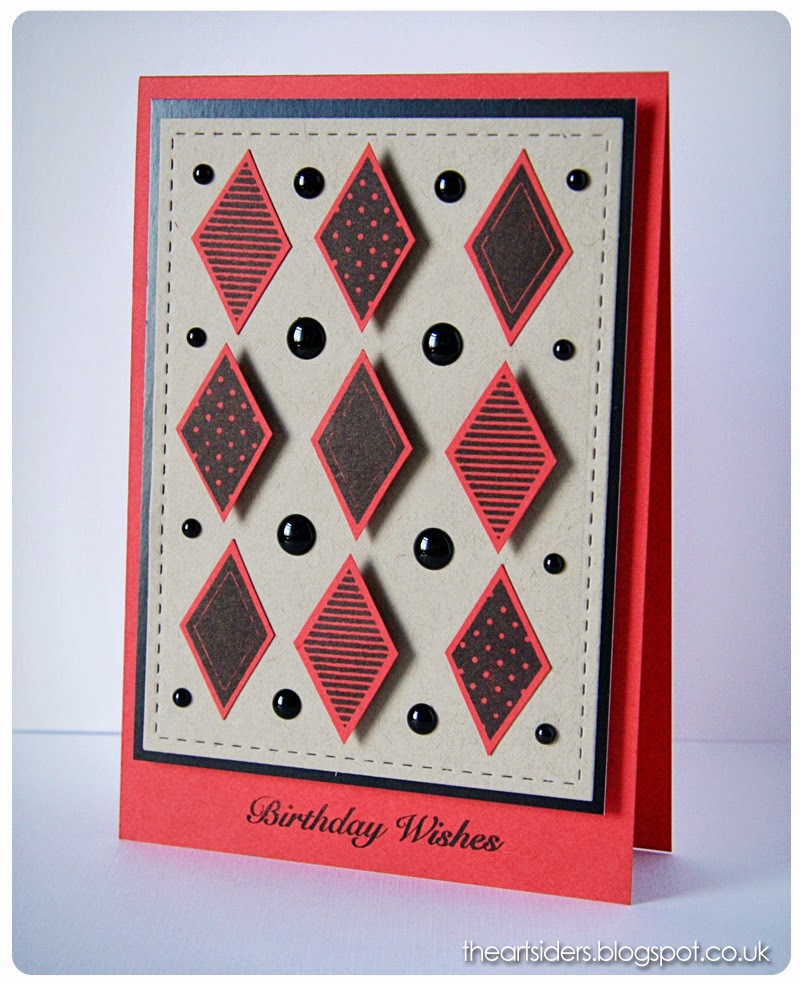
Diamond Shapes & Enamel Dots

Hello again my dahlings

I've been a bit absent online lately.  Partly due to the usual excuse of "being busy" and also because in my spare time, I haven't sat down and made anything. I've been catching up on a backlog of TV series plus I've been reading and meditating. It all eats into crafting time.

However, last night I decided to relax with stamps, scissors and coloured card.


I dug out a sheet of red card and my Clearly Besotted Geometric Style Stamps. I tried a couple of other ink colours before settling on my default when it comes to red, black. It's design-wise, my comfort zone. Must try and make a red card with another colour combo next time.

The black enamel dots are Sprinkles by Doodlebug Design Inc and are absolutely gorgeous as an embellishment, I just love the sleekness of them and the perfect glossy sheen.

Right, well the weather is perfect for a day out. Blue skies and fluffy white clouds. I'm off on a little adventure. One of my Word for the Year trips. I'll hopefully come back with photos to share in the next post

Until then, have a great weekend


Friday, 14 February 2014

Happy Valentine's Day

Happy Valentine's Day!!!!


Not that I'll be sending out any cards, flowers or chocolates myself. Nor, to the best of my knowledge, will I be in receipt of any. Not because I'm alone and loveless. If you've followed my blog, you know that's not true. Nick & I simply don't bother with it. By mutual agreement I may add too. If I want chocolates or roses, on any day of the year, I know Nick would oblige. Anyway, Nick & I celebrate our Anniversary only 10 days earlier. So it just seems too soon to go through the whole rigmarole once again.

I'm happy for the other suckers, romantic souls out there to fly arrows from cupid's bow and book dinners, buy flowers and send confectionary gooiness to their bunnikins and baby bears. It's a day for fun and silliness and who can begrudge it?

I say it every year but for new readers, today is also my parents' wedding anniversary. Which may partially explain my own reluctance to celebrate the 14th. Yes, I do give them a card.

So the card above is my contribution to the lovesick everywhere.  My valentine to the blogosphere. It's a cut and paste job using Spellbinders Square Nesting Dies. I sellotaped the dies together to form one & ran them through four colours of card. I cut two of the largest square shapes out of more card and stuck the various sized frames together onto them. I trimmed both squares on the diagonal and swapped them about. One of those squares is used here, the other for another time. The heart was die cut from velvet paper.

And if the Postie does happen to drop a little something on my doormat today, I'll let you know

Thursday, 6 February 2014

Trying out Embossing Paste

I treated myself to a couple of pots of Wendy Vecchi's Embossing paste the other day. It was good fun to play around with and I lost all sense of time. However, as lovely as the results are, it took a few trials and several errors before I began to have success. The white paste was pretty easy to master. The translucent one took a bit longer. There's a fine line between spreading on a layer which is too thick or too thin.


And given that there's a fairly long drying time, I didn't know if my technique had improved until several hours later. However, I stuck with it and came away with a couple of samples which I used in making cards.


Not easy to photograph either as the light here was quite dull but I think you can see the gist of the effect you have.

I shall continue to play with the pastes and dig out some more stencils. I'm determined to master it. If only it wasn't so darned messy.

Thursday, 30 January 2014

Poster Inspiration for a Graphic Style Card

Pinterest has a lot to answer for. It's just too deliciously tempting. I try not to venture on it very often because I know I'll be sucked in, clicking on hundreds of beautiful designs and websites. I really can spend hour upon hour, tapping on photos, completely unaware of my surroundings.

I normally save these clips to my account in Evernote. Okay, it's a bit more of a faff but I like my inspiration all in one place, so I'm not having to hunt it down.

Anyway, it was on one of these forays into Pinterest that I came across Swiss Ted. There are numerous poster designs on the website, all of which can be used to inspire card projects. Like this one for example.


And when I say inspire...well in this case, I actually should say copy.


I hardly changed anything in the design. Then again, it was an experiment at first. I wasn't intending to make a completed card. I was just curious to see if I could easily imitate the overlapping circles effect, using dies.

As you can see, I could. I used one of the Spellbinders nested circle dies to cut out five circles in different colours. I then placed the die over one of the circles to trim away a section. I made a couple of marks on the die with a pencil to show where to line it up next time. I then cut through all the circles, using the pencil marks as a guide.

It was then simply a case of piecing it all together and fixing them down. By this time, I thought, why not stamp a sentiment and have it as a card, rather than an experiment to file away.

However, as I started to clear my desk away, I noticed all the offcuts lying there. I'd seen stacked cut-out designs on other people's cards and had thought about trying it myself one day. Well, now seemed as good a time as any. So with my leftovers came this...


It's not perfect but it was useful in working out how to piece a card like this together. And, just like with Pinterest, the time just flew right by.

Thanks for dropping by, my lovelies and for all the wonderful comments you have been leaving recently. :)

_____________________________________________

Supplies

Stamps: Hero Arts - Thanks Sentiments

Dies: Spellbinders - Circles, Die-Namics - Staggered Hearts, Cheery Lynn - Love Set 2

Monday, 27 January 2014

Rainbow Hearts & Traditional Red

I treated myself to a new die set the other day. It's the Staggered Heart from Die-namic Dies. It's a great design that I can see quite a few different ways to play with. I began by creating a rainbow of colours by cutting thin strips of coloured card and adhering to a thin paper base. I ran this through the die and saw the result I was hoping for.

I placed it onto white card and stamped a sentiment. I didn't feel it needed anything else.

For the next card, I had intended to use the negative space left behind. However, the temptation to fill it overcame me, so I cut into some red card and adhered into the space.

One die, two cards again.


_____________________________________________

Supplies


Dies: Die-Namics - Staggered Heart, L'il Inkers - Stitched Rectangles

Saturday, 25 January 2014

Sketch Challenge Part 1

I sat and made two cards for two challenges and I thought I'd separate them out, as in one per post. The first is for CAS(E) This Sketch. I fancied something bold and red this time around. And yes, my graphic styled leanings had to pair it with black. I had toyed with making it all in red except the stamping but I'm in a high contrast mood.


_____________________________________________

Supplies

Stamps: Mama Elephant - Basic Borders, Kanban - Spring Silhouettes, Hero Arts - Be Happy
Dies: Spellbinders - Blossom