Pages

Showing posts with label Tutorial. Show all posts

Tuesday, 4 December 2012

Acrylic Ink Tutorial With Step by Step Art journal Page

Hi there! Well, some of you have been asking me questions about the acrylic inks I've been using on my recent art journal pages. I'm not quite up to par with creating video tutorials yet, so instead I've photographed a few of the steps involved.


To begin, the acrylic inks I use are FW from Daler Rowney. I like that they are permanent and lightfast, unlike the watercolour inks. Good to know they aren't going to fade anytime soon. Most of the colours are bright and vibrant and a handful even contain shimmer.


Now I prefer my colours to be a bit more muted and towards the neutral scale. I've tolerated the bright colours whilst I've been playing and learning. However, now I've been using them for a while, I'm understanding more how they work.

So, taking the Cool Grey, I begin with shaking the bottle and squeezing the pipette at the top, to suck up the ink. Unscrewing the cap, I take an old saucer and drain the pipette of all it's ink.


I take another colour, in this case, the Purple Lake and add just a few drops of the ink. When working with acrylic inks, you need to mix your colours first, before applying them to the page. You can not apply washes of colour on top of each other (eg If you paint a wash of yellow, then a wash of blue over the top, it will not give you green).


I take a pipette with clear water (though you don't need a pipette, you can use a brush, or stick your finger over a plastic straw), and add a few drops to the mix.


The next step wasn't easy to photograph as you need to work quickly to achieve a smooth finish. It doesn't take long for acrylics to dry, even with water added to them. Stopping to take photos, can lead to streaks.

However, I start by placing a scrap of paper under the page I'm working on (here I'm working on a small A5 size page). Then I take a sponge applicator, dip into the ink from the saucer and apply in even strokes, working from left to right (I'm left handed) top to bottom. This page has not been treated with a coat of gesso beforehand because, in this case, it doesn't need it. However, these inks will work perfectly fine over gesso if you have.


I work all the way to the right of the page and then run the sponge over the still wet page again, to even the distribution of the ink.

Let the page dry (or speed up the process with a heat gun) and decide if you wish to apply a second coat. Let each wash of colour dry first before applying another on top.

Okay, that's the step by step on creating the backgrounds for my pages in acrylic ink. But I thought I'd include the next few steps as I build up the page. There are no hard and fast rules here. This is just one idea of many.


To begin, I've created a doodled frame using Faber Pitt pens and Derwent Coloursoft Pencils. The joy of acrylic ink is that you can draw and paint over them with all sorts of mediums that you already have in your stash.


The next step is to grab some magazines and start building a collage. Be weird, wacky and as surreal as you please. I love this stage, it's where serendipity takes over. As I flick through magazines, I just let instinct take over and grab images I think I can blend together. I arrange the cutout images beforehand and once happy, glue them down.


Adding text is next for me. I'm not interested in the personal journaling side at the moment. I'm all for it and I wholeheartedly endorse creativity and art as a therapeutic process, for those who desire it. But it's not my motivation for art journaling. 

At the moment, I enjoy adding quotes which I find on the internet. Especially those which speak to me about the joys and frustrations of art. 

I draw guidelines lightly with a pencil. Here I've used a ruler to create straight lines but you can draw loose curvy lines too. Then I lightly pencil the words in capital letters. I ink over with a fine black art pen (here I've used a Micron pen) and thicken up some of the letters. The words in white, I drew with a Uniball Signo.


And finally, draw over the collaged image, adding whatever lines and doodles you wish. Just go with the flow. Believe me, this is such a relaxing, meditational process. And seriously addictive. I can find myself up to the wee hours of the morning working on these and I'm a typical lark. I am wrecked at nights and need to hit my bed well before midnight.

I hope this, in some small way, encourages you to try out art journaling. You don't have to use acrylic inks, there are all sorts of ink, paints and techniques to try. I've only scratched the mere surface in my own journals. There are lots more ideas I want to try out and play with.

So until next time
h&k
Pxx

Monday, 9 April 2012

Ball-Tool Flowers with Crimpered Leaves Tutorial

Hello all. I'm afraid the title of this tutorial is a bit of a mouthful. Believe me, I tried to think of a snappier title but one didn't surface. Somedays the creative part of my brain works, others, it feels like hibernation has set in.

Anyway, this is how I spent my Easter Sunday. Who knew that it could take a day almost to blog a tutorial from start to finish? It doesn't help that I decided to photograph the whole project twice. The first flower was produced with red card and just didn't have enough of a shabby vintage feel to it. So I went again, with a different process, as you will see. And though the temperature outside here has dropped, I was down to a T-shirt in my craft room, under the heat of the lights and I was still too warm. 

However, it was great fun to do plus I managed to sneak in some polka dot patterned Washi tape into the resulting tag (I blame Kory for tempting me into my recent purchases). 


So without further ado, I give you..the Ball Tool Flower, accessorised with Crimpered Leaves!


Materials:

White Card 
Black Card
Tattered Rose Distress Stain
Tea Dye Distress Ink
Die or punches to cut flowers in three sizes. I've used Tim Holtz Sizzix Tattered Flower Garland
Paintbrush, Ball tool or Pen
Mouse Mat
Perfect Pearls Mist - Heirloom Gold
Paper Crimper


To begin swipe the white card with tattered rose distress stain. Dry with a heat gun. Turn over and colour the back. Again, dry with a heat gun and repeat on both sides so that it has two coats of stain either side.


Cut the flowers out with your die cuts or punches. You will need two large, two medium and two small. Though I've used a Tim Holtz Flower Garland die for this tutorial, I've also created flowers with other dies and punches. As long as they have individual petals within the shape. And it doesn't matter if they have six petals, like these, or five. 


Add a darker colour of ink to the tips of the petals. I have used Tea Dye distress ink but you go with whatever is in your stash already. (Have you noticed the obvious sequence error? The die cut flowers in the previous photo have already been inked. Oops!).


The petals are going to be shaped using a "bowl" technique. There are plenty of tutorials online and in books, where you'll see this method demonstrated. It's also very versatile and can be applied to all sorts of flower shapes.  This is where you will need a mouse mat as your base to work on. You will also use your ball tool for this, or as you will see, in my case, the end of a paint brush (pens, with a smooth capped end, can also be used). Begin by pushing the tip of your tool down onto the edges of the petals. The 'give' in the mouse mat will begin to crinkle the paper. 


Once you've pushed down or stabbed the edges, move onto the centre of the petal. You will now be seeing the petal form into a cup.


Now, you want to swipe the tip of your tool from the centre of the petal to the centre of the flower, using gentle pressure. The petal should be lifting and curling upwards.


Do this to all the petals on all the leaves and you should end up with six "bowls" - hence the name of this technique.


Flip over the two larger flowers and the two medium flowers.


Taking your tool tip, push down on the centre of the flowers, into the mouse mat. You may need to gently help the petals to fan out as you do this. There will now be a gentle bowl shape in the centre of the flower with the inverted cup shaped petals slightly lifting.


You will now have four shaped flowers with the two smallest still in their bowl shape.


Glue the two largest flowers together, interleaving the spaces between the petals.


Once the glue has dried, adhere the medium arrangement to the larger one. Press down, only in the centre, to ensure the flowers keep their shape.


Now it isn't easy to see in the photo above, but you will now add a dollop of pva glue to the inside of one of the smallest flowers. You will then take your finger and spread it around the inside.


Gather the petals into a tighter shape by pinching in with your fingers and letting them overlap each other to form a bud. Hold like this, until the glue sets. By spreading the glue out evenly in the previous step, you will speed up the time this takes, which will probably be just a couple of minutes. You will know the glue has set, when you take your fingers away and the bud doesn't open out.


Add glue to the inside of the remaining smaller flower. You can just add a few dots this time, you do not need to spread it out.


Pop the bud into the centre.


And again pinch the petals up and around the bud, letting the petals overlap. Hold in place until the glue sets. Alternatively, once you have pinch the shape together, release and let the petals unfurl to form a looser bud.


Attach this bud to the top of your flower with another dab of glue and leave to dry.


For sizes and instructions on how to cut out leaf shapes, refer to the end of the Tattered Bloom tutorial here. This time around however, I have used black card sprayed with Perfect Pearls Mists, Heirloom Gold.


Now, instead of wetting the card and crumpling up, you are going to run them through a paper crimper, making sure you insert the folded leaves in at a 45 degree angle.


Open the shapes up and you will have a trio of beautiful, shaped leaves.


Glue the leaves to back of the flower and you are done. If you don't have a crimping tool, use the technique described in the tattered bloom post. Or you may have a punch or die to create your leaves. Use whatever is at hand. 

Note I have not given you any sizes in these instructions. Just Large, Medium & Small. That's because you can make these flowers in a variety of shapes and sizes. You have the creative freedom to produce a whole spray of blooms, large and small, with different flower shapes and colours of card to suit. And if you are so inclined, you can even hand cut your own flower shapes. 

This flower is a bit more involved than the previous ones I've demonstrated and yes, you may find your hand begins to ache with all that stabbing, pressing and shaping that's required. It's a flower you can make one or two at a time. It's certainly not one to try in batches. However, the results are worth it.


Thursday, 29 March 2012

Scrunchy Flower Tutorial


Here's the second of the two flower tutorials I produced as a pdf, which I have now brought over here. Well, it's nice to have them all together in one place.


The materials you need:

Plain Ivory Colour Card
Circle Dies: I’ve used Spellbinders Circles 23mm, 35mm and 48mm dia. i.e. the three smallest. 


With the circle dies, cut out 1 large disc and 2 of each of the medium and small discs from the card. Spray with water to dampen. 


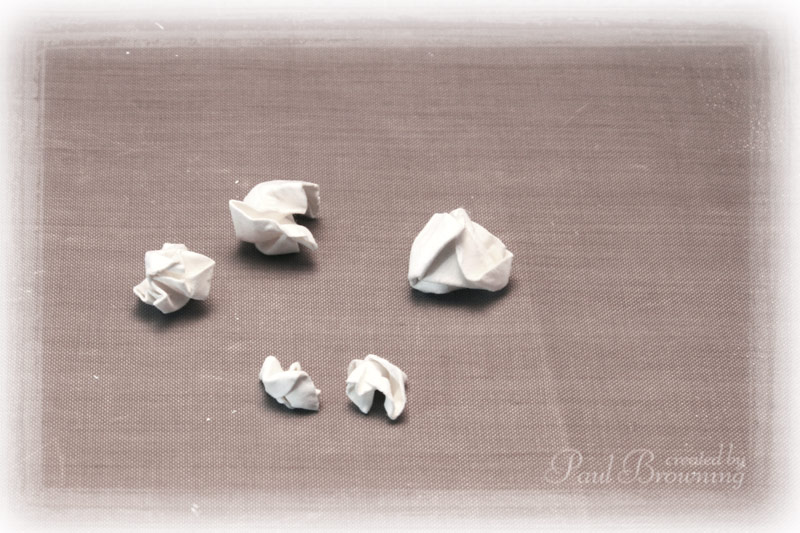
Scrunch up tight, each of the circles.


Unfurl them and lay back out on your craft sheet. Give them another spray of water to keep damp.


Cup your hand and press each disc into it with your finger to create a bowl shape. The card is easy to manipulate whist damp, so tweak and pinch the edges with your fingers until you’re happy with it’s look. 


With the two smallest circles, Pinch them into tighter, trumpet-style shapes.


Leave the pieces until they are bone dry. Use a heat gun to quicken up the process. 


 Use pva glue or similar and layer the flower together. Largest on the bottom, followed by the medium two & top with the  smallest ones. Yes, it really is that easy to make.


If you don’t have the Spellbinders circle dies, don’t rush out immediately to buy a set. I use them for convenience but you can easily handcut out rough circles from the card using just a pair of scissors. Also, if you do already own similar dies of a circular shape, why not try them out instead. The flower above on the left was created with a scalloped circle set and the one on the right using the Blossom Nesties. 

Tattered Bloom Tutorial


Welcome to my first ever online flower tutorial. It's a tattered paper bloom which incorporates one of my favourite techniques of wetting and shaping card. Some of you will have seen this before in PDF format but I thought I'd bring it over here too.


So to begin. The materials you will need:

Card -  Ivory, Dark blue, Light blue
Sun Shaped Punch
Dark Blue Ink Pad


From the light blue card, cut out a 5cm square and a 4cm square.


Start from middle of the top edge and tear to the middle of the left hand edge. Keep tearing to the middle of the bottom edge, right hand edge, back up to the top.


Do this with both squares and you will now have two rough shaped circles.


With a pencil, lightly draw a circle in the centre and five lines going out to the edge. 


Using the pencil marks as guides, tear the card to make the petals.


With a mister, spray the card pieces with water. You want it lightly wettenned, not soaked through.


Take the back of a paint brush and press into the middle of each flower shape. 


Carefully fold the petals up around the brush’s handle.


Squeeze the card tight around the brush to form a tube like shape and carefully remove.


With a heat gun, give the shapes a blast, to dry them out. 


Now, VERY carefully, unfurl the shapes. You need to feel your way around each petal, one by one. It’s easy to rush and tear a petal off. Once flattened out, dry out again with a heat gun


Take your ink pad and apply to the edges of the petals. I used a dark blue but any dark colour, say a brown, will be an excellent alternative.


With tweezers, curl the sides of the petals towards you. If you don’t have tweezers to hand, curl the petals around a cocktail stick.


Punch four sun shapes (approx. 15mm dia) out of the darkest card. Take a mouse mat and press each shape into the mat with the back of the paint brush to form a bowl.


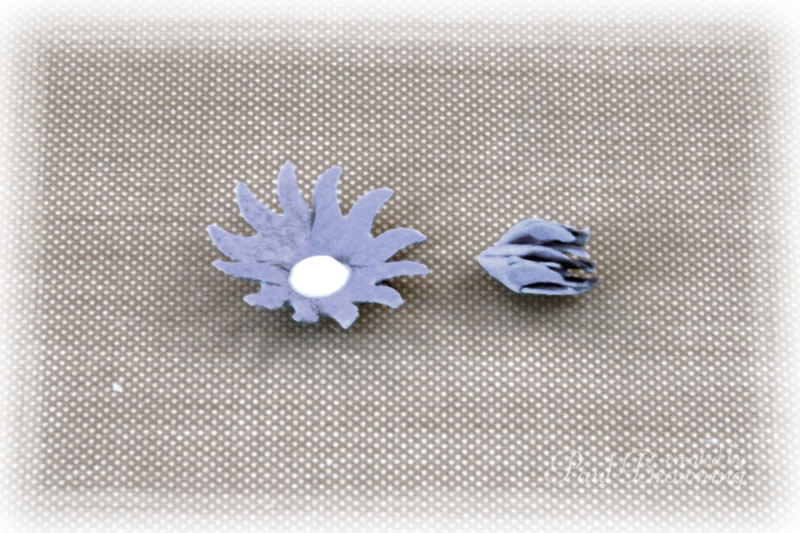
Scrunch up one shape as tightly as you can. Add to the centre of a second shape with a dab of glue. Scrunch the outer shape around the central bud.


Take this bud and glue to a third shape. Scrunch up.


Finally take this bud and glue to the fourth shape. Again scrunch up. 


You now have the three components for your tattered bloom.


Place a dab of glue in the centre of the largest flower and arrange the smaller one on top. Try to offset the petals to give a rounder looking flower.


Add another dab of glue to the centre and attach the bud. And there you have it. You can stop there and use this flower in your projects as it is. However, if you’d like to add some leaves...


Take a strip of the ivory card (approx. 10cms x 5cms) and fold it in half along the length.


With scissors, cutting along the folded edge, make three rough half-leaf shapes. Open them up to see your results and if you wish, fold again and fine tune your leaf shapes.


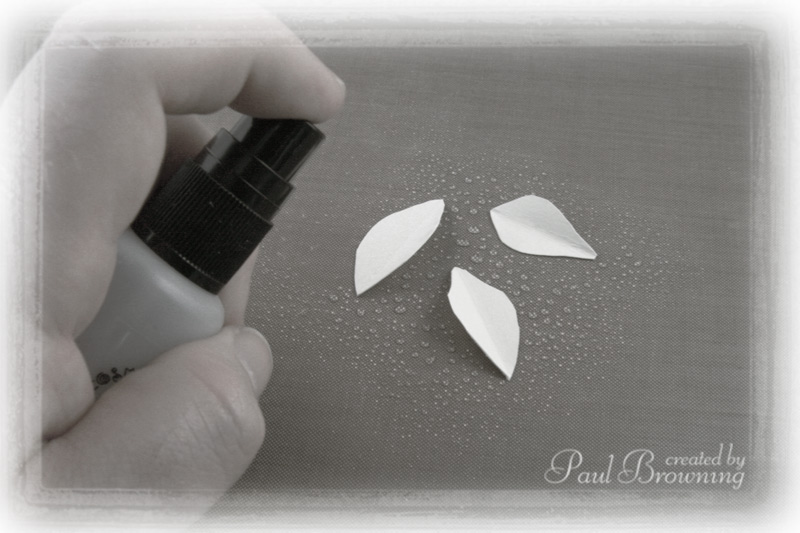
When you are happy with your leaves. Spritz them with water.


Scrunch the leaves up into ball shapes and dry with a heat gun.


Unfurl the shapes and fold in half to revive the central crease in each leaf. As an optional extra, you can distress the edges carefully, with a craft knife, scissor edge or distressing tool.


Add a dab of glue to one end of each leaf and arrange behind the flower.


Once you’ve made your first tattered blooms and learnt the process, you can begin to produce them in batches, to have ready in your stash collection for future projects.